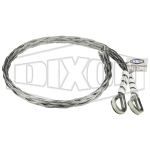
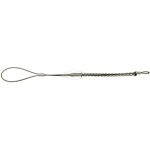
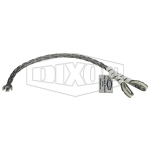
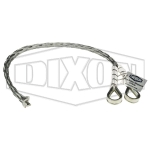
Dixon® King Safety Whipsock, 1.181 - 1.575 in Hose Diameter, 1 in Cable Diameter, 1500 psi, 34-1/4 in Length, Carbon Steel, Finish: Galvanized
California residents see Prop 65 WARNINGS
| Product Type | : | Safety Whipsock |
| Hose Diameter | : | 1.181 - 1.575 in |
| Cable Diameter | : | 1 in |
| Pressure Rating | : | 1500 psi |
| Length | : | 34-1/4 in |
| Material | : | Carbon Steel |
| Finish | : | Galvanized |
- Provides stand-by safety and minimize uncontrolled whipping
- King™ safety whipsocks keep the hose under control in the event of a high-pressure hose assembly failure
- Galvanized steel woven stockings extend down the hose to grip securely over a larger area preventing whip, abrasion and wear
- Securing both eye-to-rigid or eye-to-eye anchor points reduce whip in the event of a hose connection failure
- Galvanized carbon steel wire rope
- Aluminum ferrules
Applications: For applications where the media being transferred is under higher working pressures such as air, water, hydraulic and slurry
Instructions:
- Instructions for properly installing, securing and maintaining King™ safety whipsock (high pressure hose restraint designed to secure hose-to-hose and hose-to-rigid anchor points to minimize uncontrolled movement in the event of hose connection failure or separation).
- Step 1: Select the appropriate King™ safety whipsock based on the hose OD and working pressure of the hose.
- For shorter assemblies a custom double ended, 4-eye whipsock, must be used. Note: Only use custom Whipsockson the specific length and diameter it is labeled for.
- Step 2: Always ensure to inspect entire King™ safety whipsock for frayed wire and corrosion before each use and installation.
- Replace immediately if damaged or worn.
- Step 3: It is necessary that the hose is clean and free form oil and dirt before use.
- Step 4: Compress the tail end of the King™ safety whipsock to open the ID, work the stocking to slide the grip down the length of the hose.
- Run your hands down the grip from the coupling end to the tail to smooth out any gaps or loose wires in the grip to ensure contact with the hose.
- Step 5: After coupling, slide the King™ safety whipsock up the hose into secured position just behind the fitting, ensuring the eyes have enough length to reach the anchoring points.
- Avoid overlapping the stockings if King™ safety whipsocks are on each end of the hose.
- Step 6: Using a King™ safety shackle or bolt, nut and pin style clasp, rated above the breaking strength of the hose, securethe hose restraint at two horizontally opposed, rigid anchor points rated for the application.
- Step 7: Slight slack in the legs is preferred.
- This will allow a travel distance for coupling in disconnection and greatly reduce the load applied to the hose restraint.
- A travel distance of up to 1 - 2 in (40 - 50 mm) is recommended.
- Note: For ease of installation it’s recommended to attach prior to installing coupling assembly.
Safety Notes:
- Dual anchor points secured beyond the fittings eliminate hose whip.
- Be sure the anchoring points are rated for the application.
 sales@tipcotec.com
 410-356-0003


 Specification Sheet


